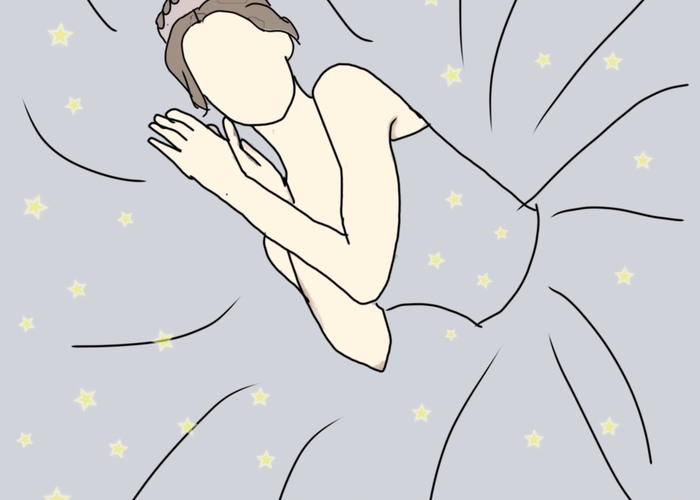
This is hand-drawn...!! I finally ventured into the world of【Line Art Processing】that I've been curious about!
2020.04.01 published
Sugosuguru... The World of Line Art Processing.
Occasionally seen in the Instagram of young fans of Johnny's and Kpop, these expressionless, illustration-like images.
This processing is called **Line Art Processing** ♡
I have been interested in line art processing for a while and, since I love editing, I've always wanted to try it...
However, until I researched how to do it, I thought there was an app specifically for line art processing that could convert photos into illustrations with one tap...!
But it was different.
In reality, everyone draws this by hand...!
(Isn't that amazing...??)
It looked difficult, but I tried it too!
When I heard that everyone was creating their own line art processing, I was taken aback and thought there was no way I could do that... But I decided to give it a try at least once! It’s okay if it's not perfect! So I actually gave it a shot.
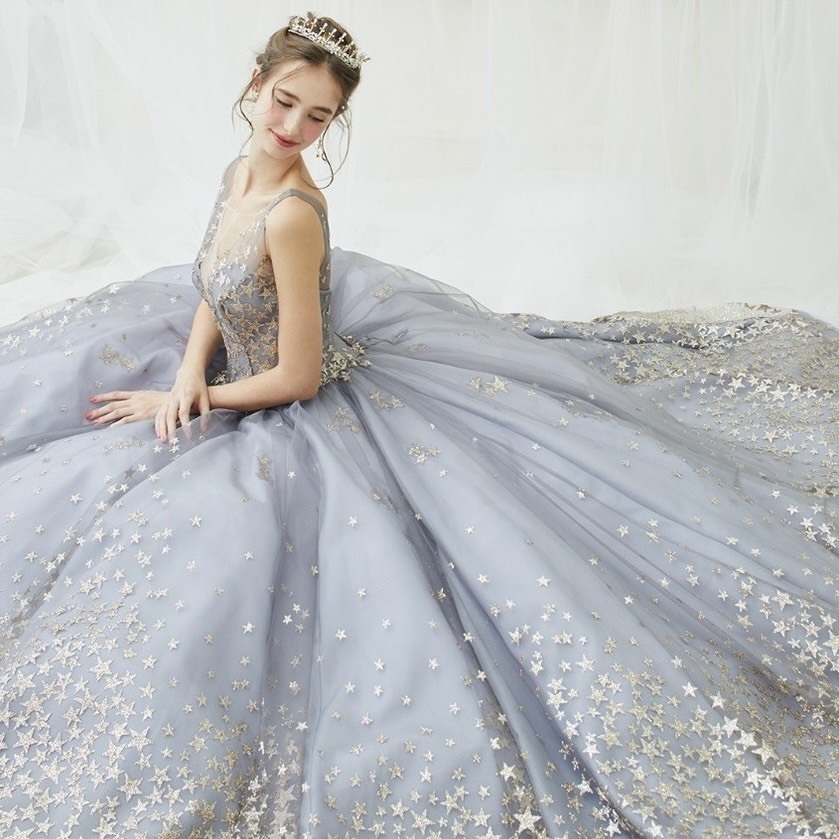
I used a photo of a marry dress for this ♡
The app needed for line art processing is ibisPaintX.
You can download it from here.
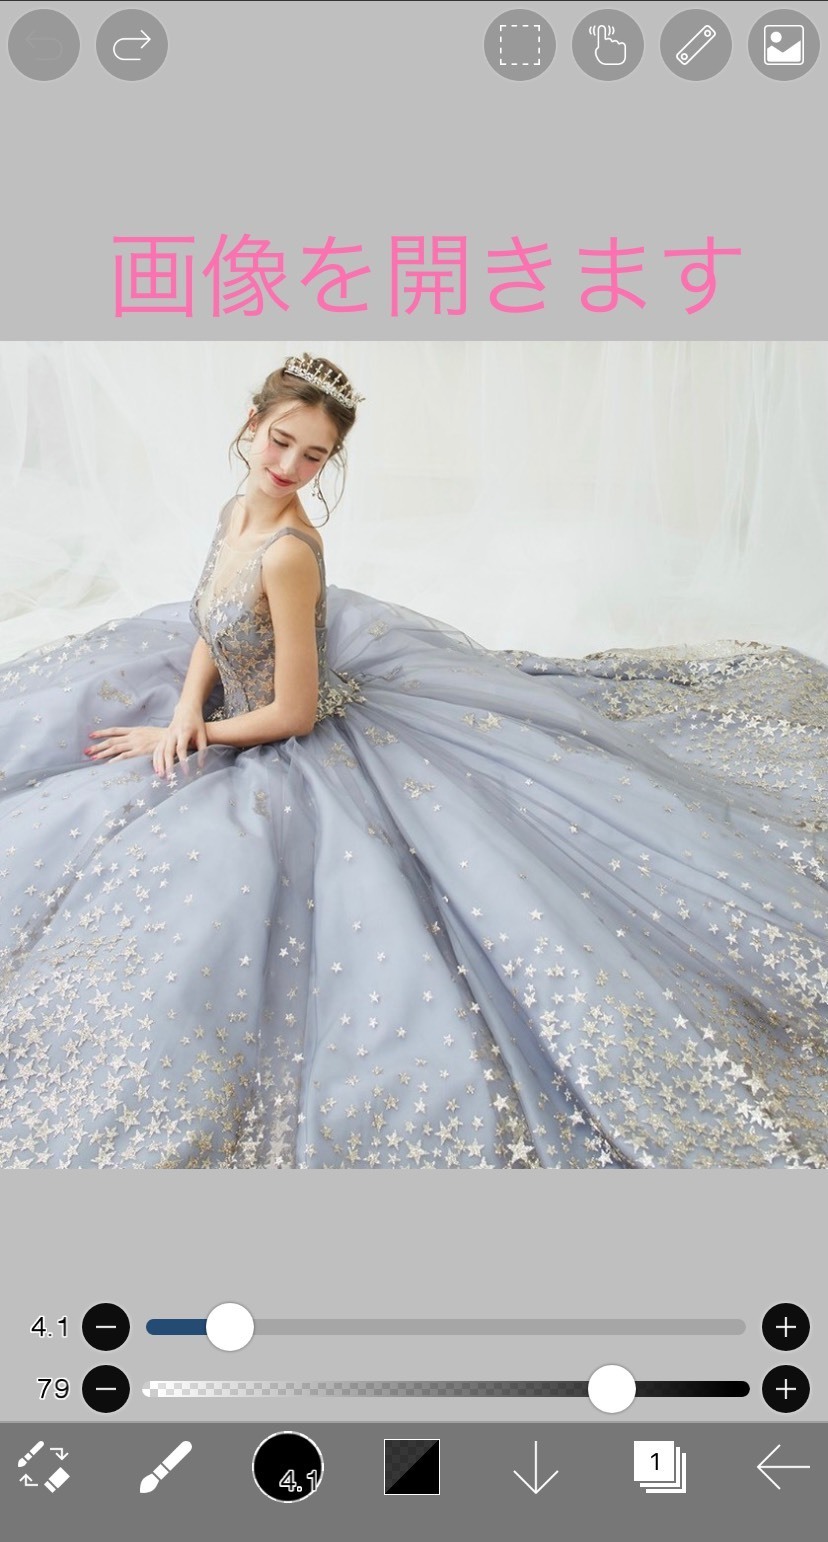
Step 1: Open the ibisPaintX app
Tap "My Gallery" ➡ Hit the "+" button on the bottom left of the screen ➡ Select the original photo you want to turn into line art from "Load Photo".
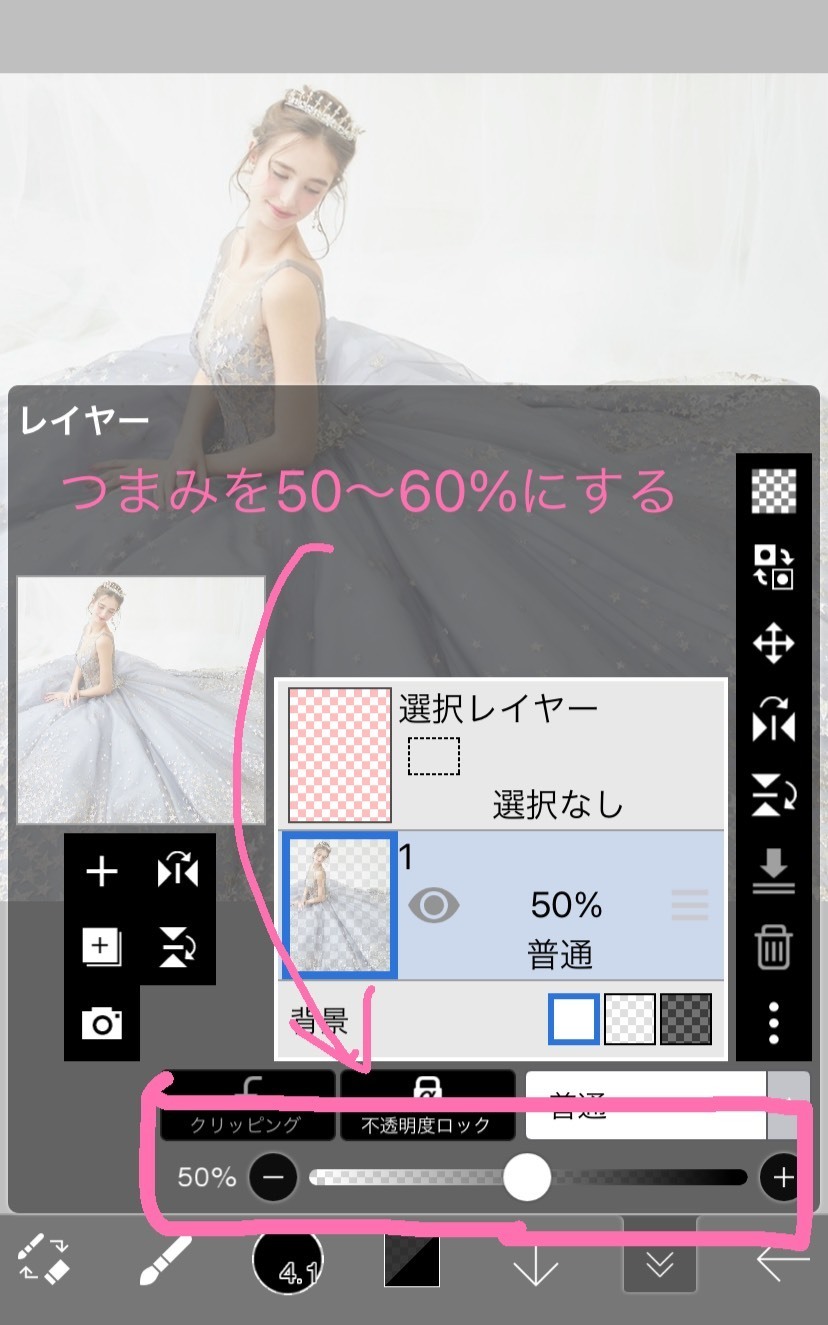
Step 2: Reduce the opacity of the original photo
Tap the "Layer" button at the bottom right of the screen ➡ Lower the opacity knob to about 50-60%.
The color will become lighter, making it easier to trace*
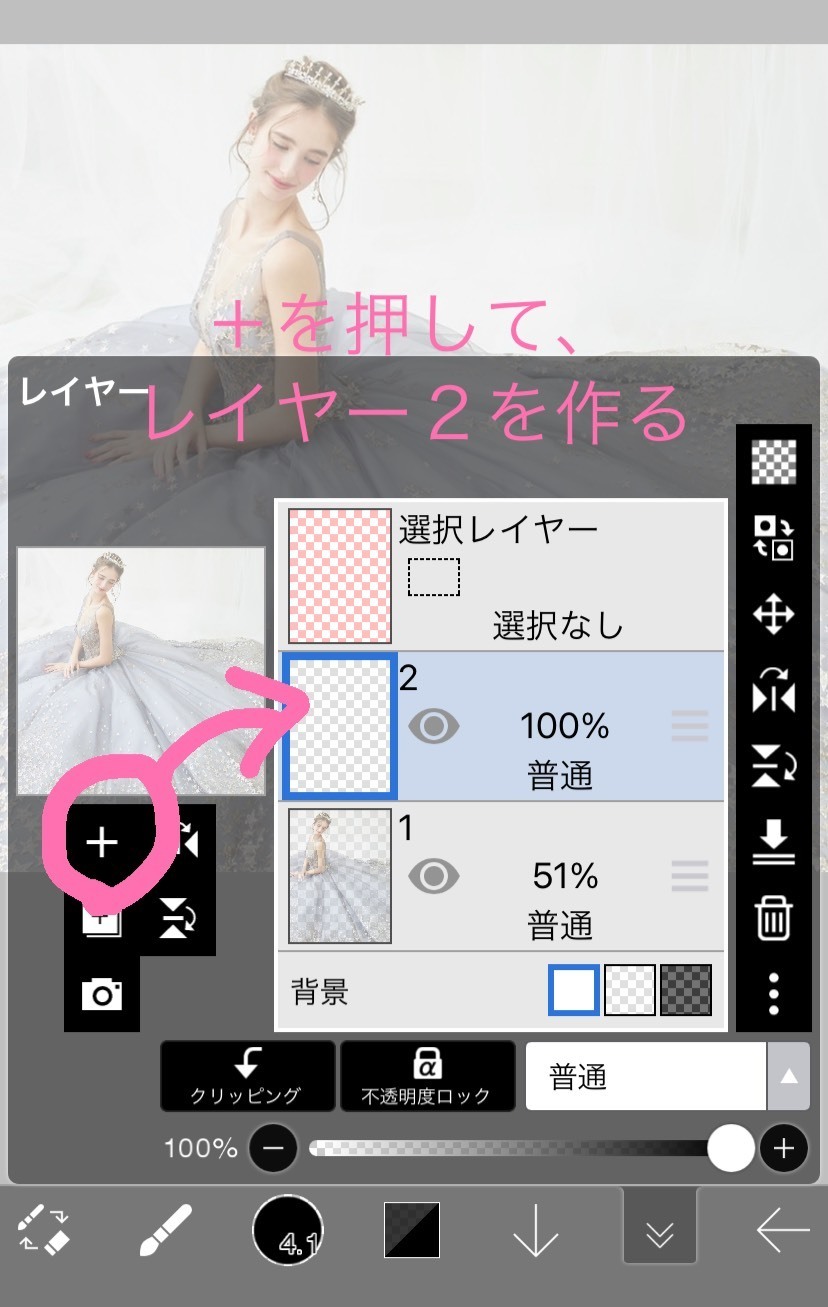
Step 3: Create a new layer
Press the "+" button ➡ Layer 2 will be created
We will use this layer.
Step 4: Trace the outlines of the face, body, and clothes
Zoom in on the photo with two fingers and start drawing lines.
However, some parts may inevitably turn out crooked or shaky.
But surprisingly, once the colors are added and viewed from afar, they might not even stand out, so instead of aiming for perfection, I’ll do my best with a moderate quality♩
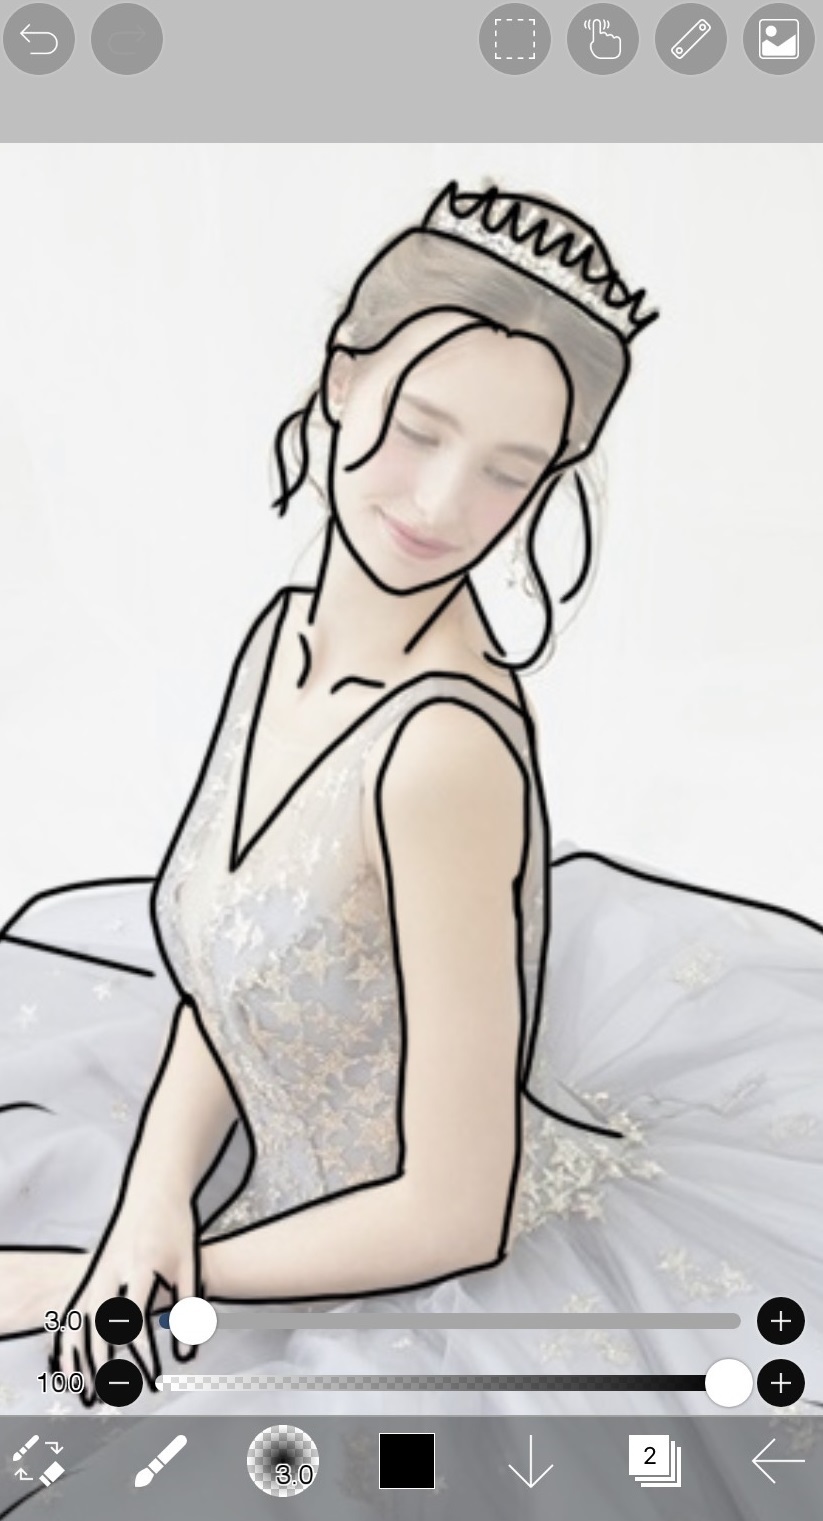
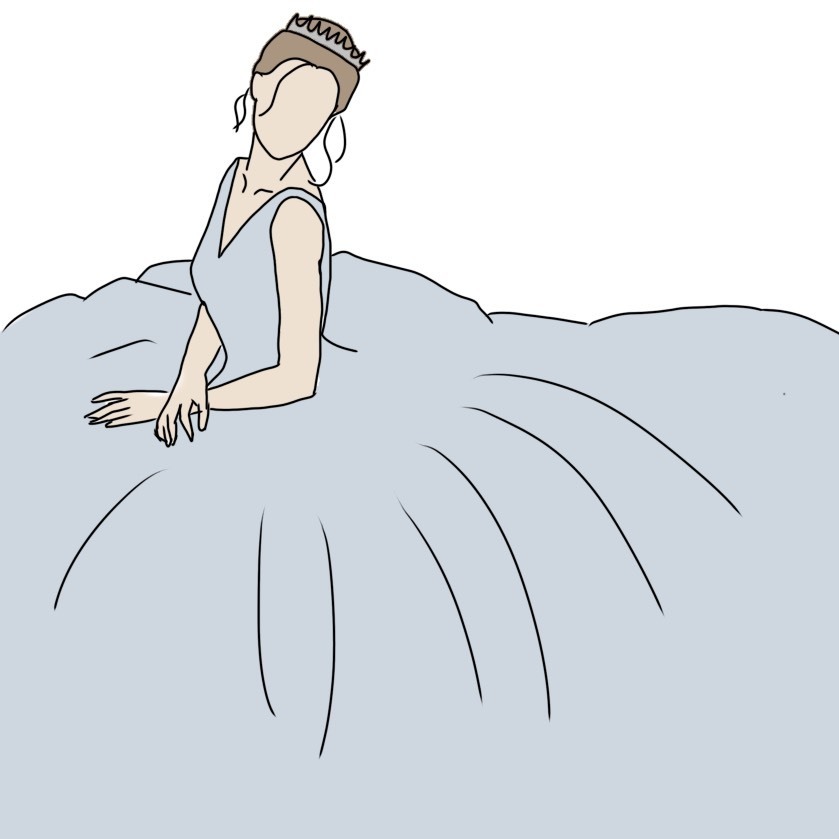
Once I traced all the outlines, it turned out like this!
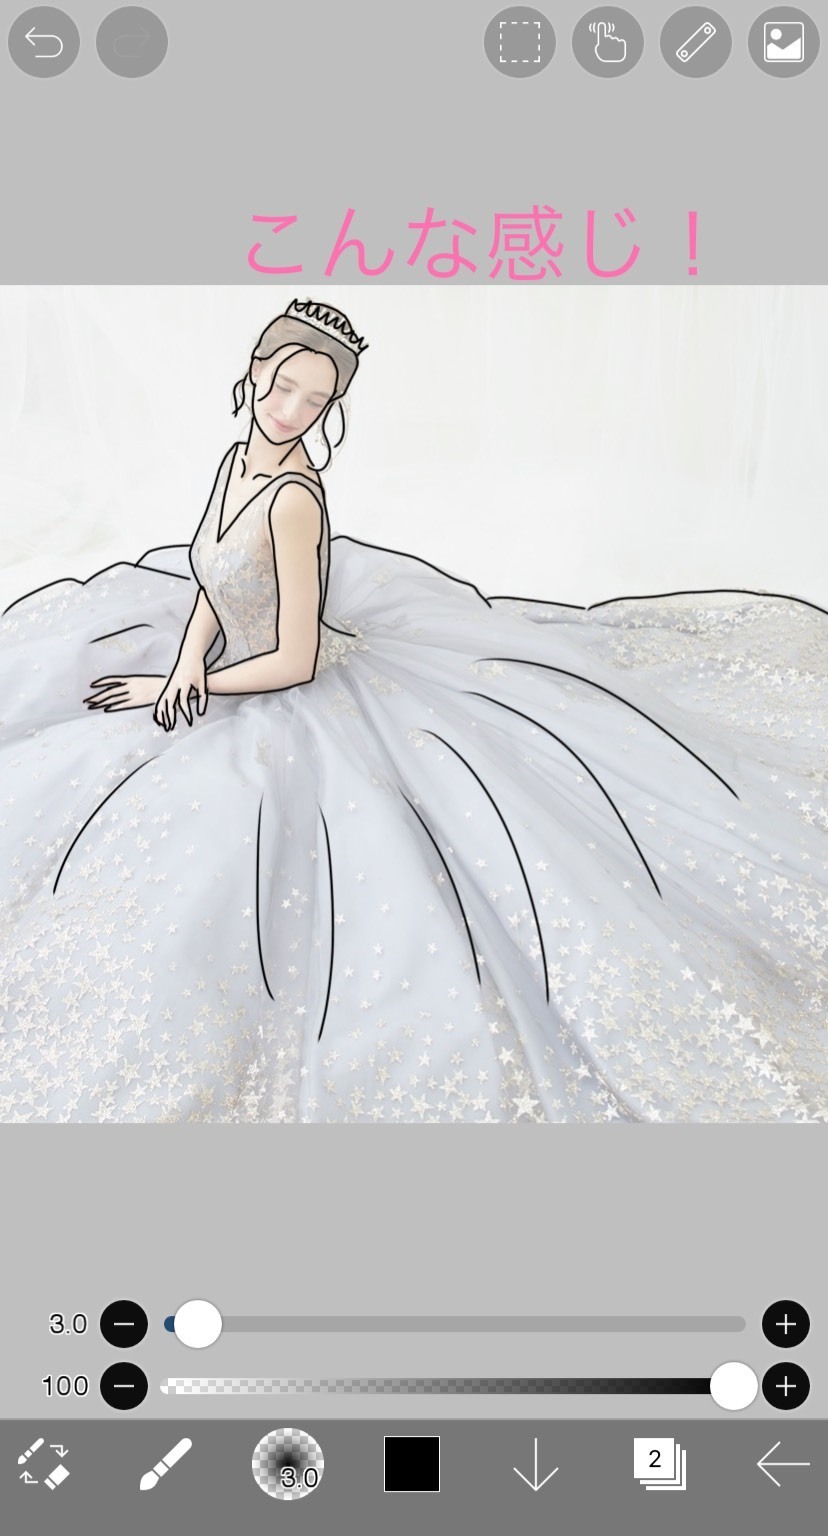
Step 5: Create another layer and color it using the fill tool
Next, let's add some colors.
Just like before, create a new coloring layer. Make sure to move the coloring layer below the line layer.
Press the three lines on the right side to change the order of the layers.
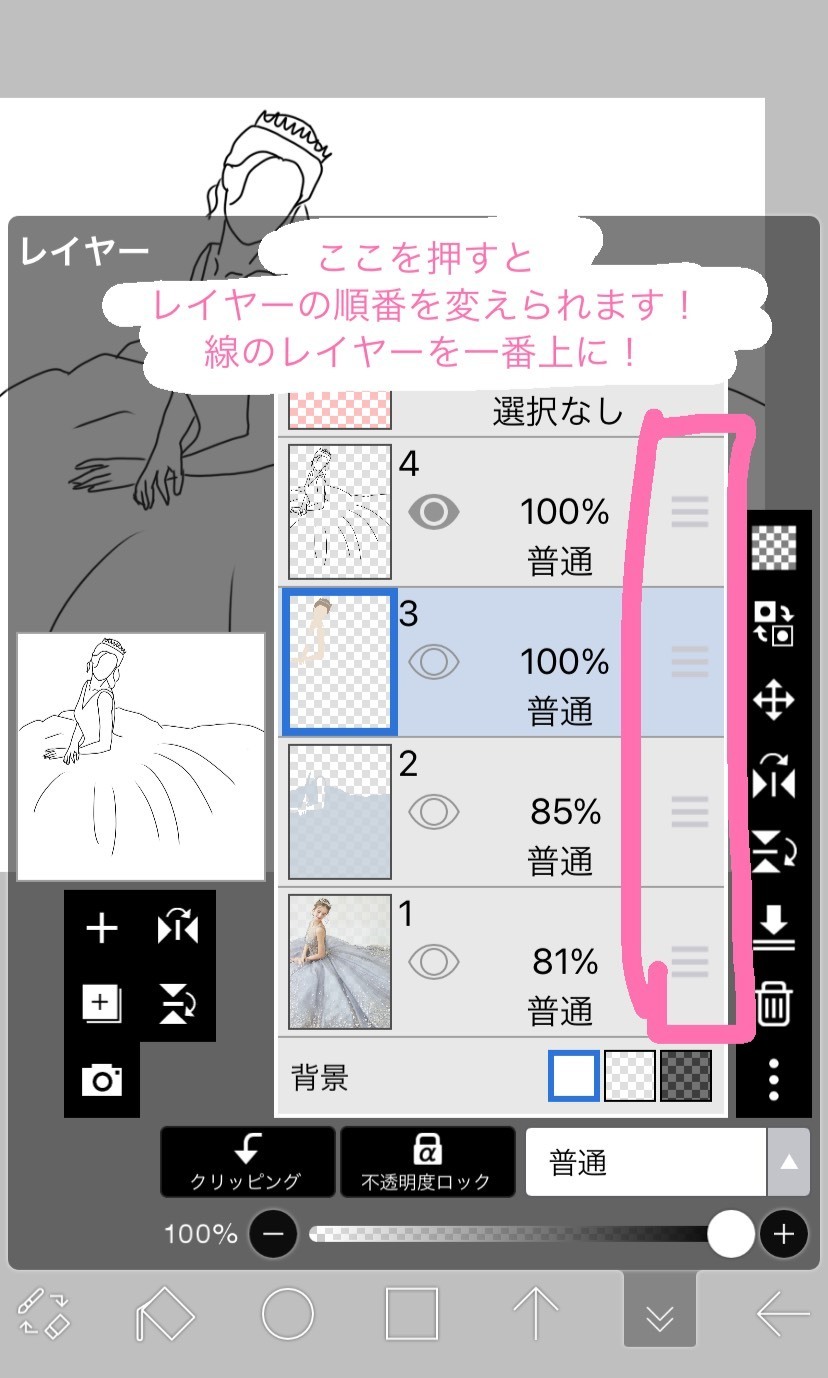
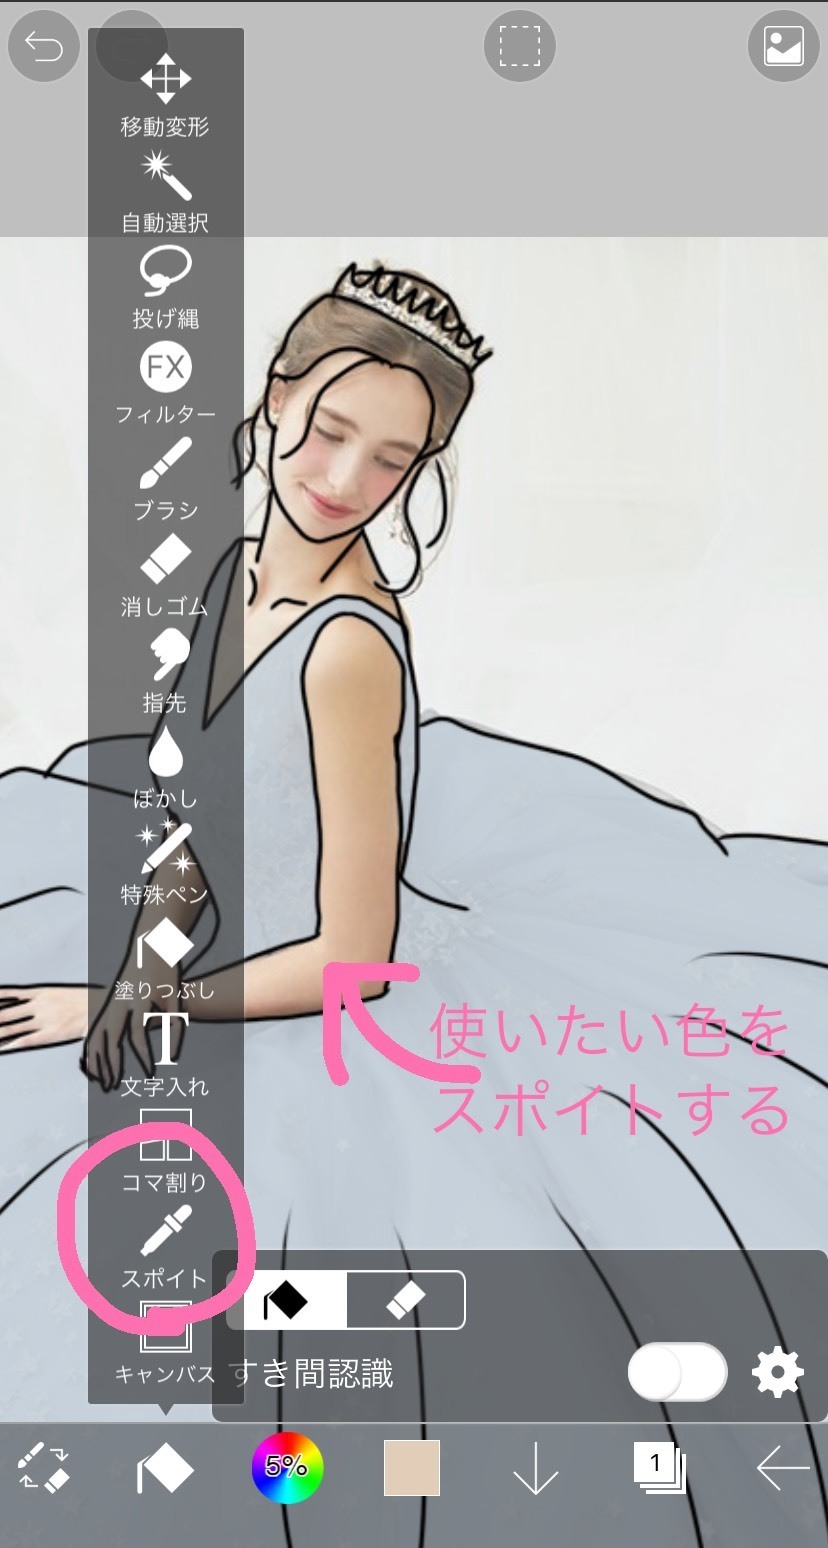
After the layer settings are done, use the eyedropper to pick the colors you want.
At this point, if you increase the opacity of the original image at the bottom of the layers, the colors will become bolder.
(Feel free to adjust to your liking)
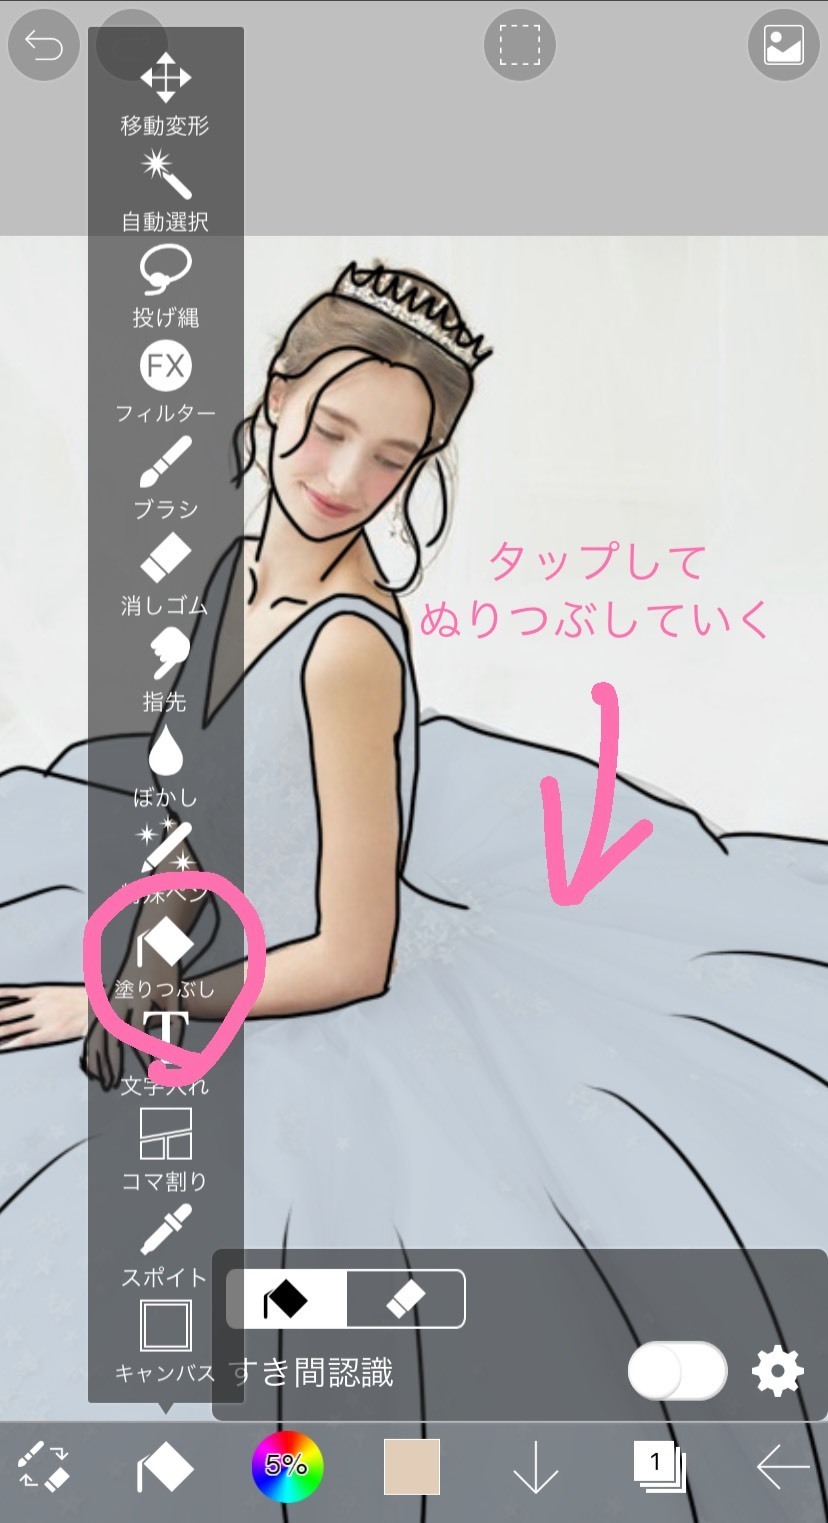
Then, use the fill tool to tap on the areas you want to color.
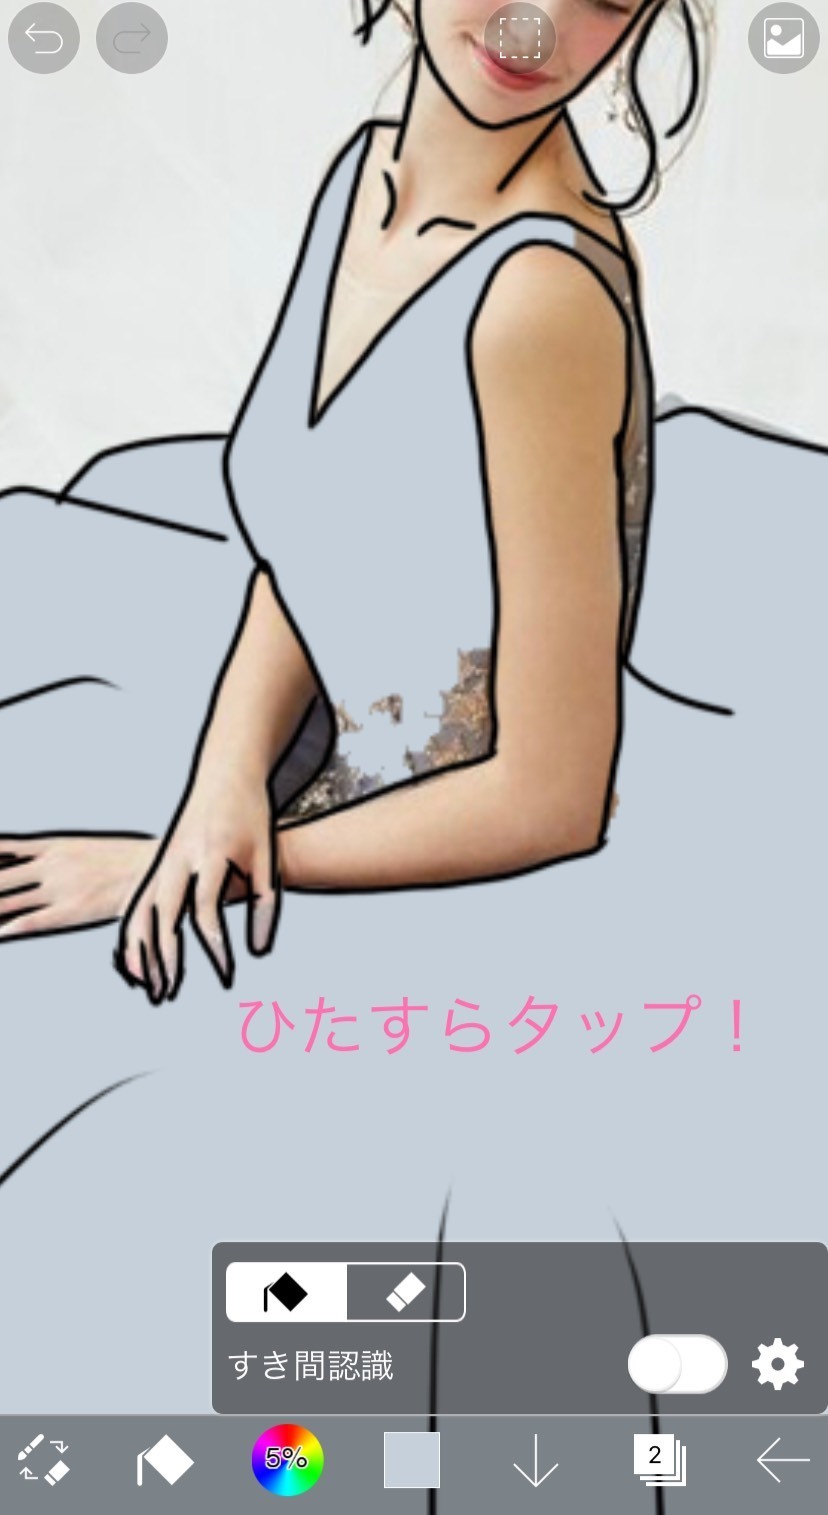
Be careful during this step, as if the lines do not connect properly, the color might spill into different areas.
Finally, press the eye icon next to the original image layer to hide it and save the image.
And here’s the result ♡
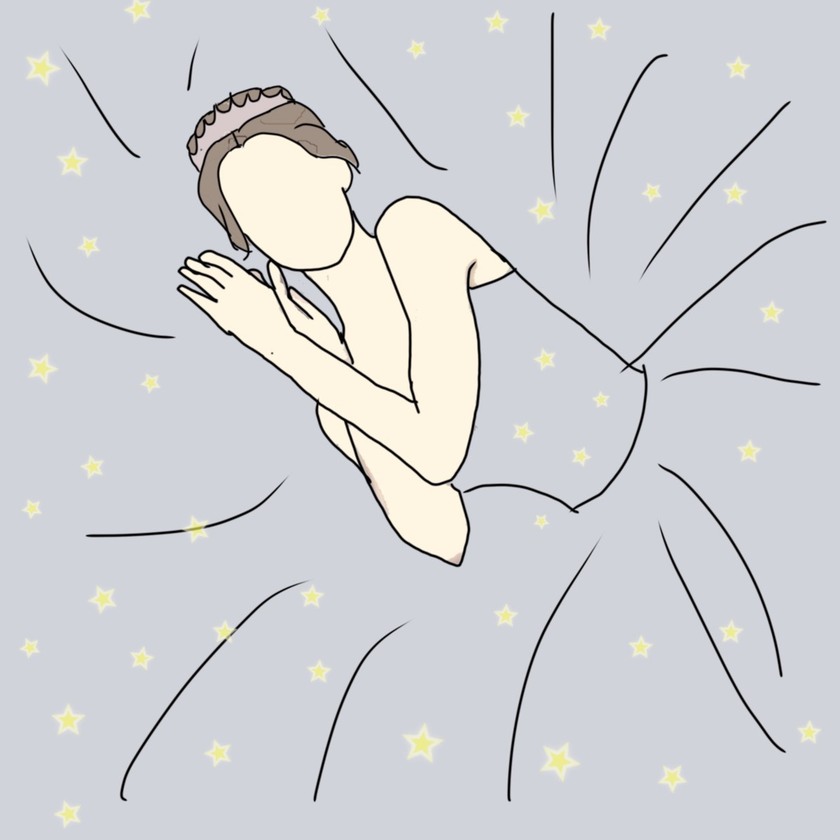
This is the line art processing I created ♡
What do you think...????
Surprisingly, I think it turned out well!!
For the stars, I added some star stickers quickly using PicsArt*

I also tried creating it with LINEcamera.

Surprisingly fun, I might get hooked!
The simple and stylish atmosphere of line art processing could be used, for example, for a one-point design in wedding paper items, etc. ♡
Having actually tried it this time, it was surprisingly fun, and I might want to do it with more images...!!
If you love processing and design, give it a try ♡
Check out other processing articles from here ♡
The marry site has many other processing articles.
Please take a look*
①
②
③
➡ It doesn't look like a lie! How to create "clouds of hearts" using two apps*
④
➡ Draw balloons however you like with an app! I played with ideas for hand-drawn balloon processing*
⑤
➡ You can add it to any photo! Here's how to add "shooting star processing" to wedding photos☆
⑥
⑦
⑧
⑨
⑩
➡ Shocking! An app that can create "Uyuni Salt Flat-style processing" from any photo is amazing!
⑪
➡ A cute "magazine-style processing" with white border lines around people ♡
![marry[マリー]](https://imgs.marry-xoxo.com/assets/marry_logo-e3a503203d635925f956631f4df079fe97f587ed360274455ead4fe26052b631.png)
 結婚式DIY
 ペーパーアイテム
 通販
通販
 ウェディングアイテム
 コラム
コラム
 ウェディングケーキ
 お金・節約
お金・節約
 髪型・メイク
 ドレス
ドレス
 和装
和装
 前撮り・ウェディングフォト
 靴・アクセサリー
 ブーケ
ブーケ
 挙式
挙式
 披露宴
披露宴
 ウェルカムスペース・装花
 引き出物・ギフト
 BGM・ムービー
 二次会
二次会
 ラブラブ結婚生活
 プロポーズ
プロポーズ
 顔合わせ・結納
 入籍
入籍
 式場探し
式場探し
 ハネムーン
ハネムーン
 ネイルアート
 指輪
指輪
 美容
美容
 新郎
新郎
 両家家族(親族)
 ゲスト
ゲスト
 韓国風
韓国風


