
Transforming Mask Cases into Place Cards! How to Create "Guest Name Stickers" at Home
2021.10.16 published
Have you prepared the mask cases?
Mask cases to be used by guests at the wedding.
I think that it’s common to hand out the mask cases either at the reception or to leave them on the guest tables.
When leaving them on the guest tables, you can also use name stickers to label each seating as a place card♩
(You can also write the table number and use it as an escort card♡)
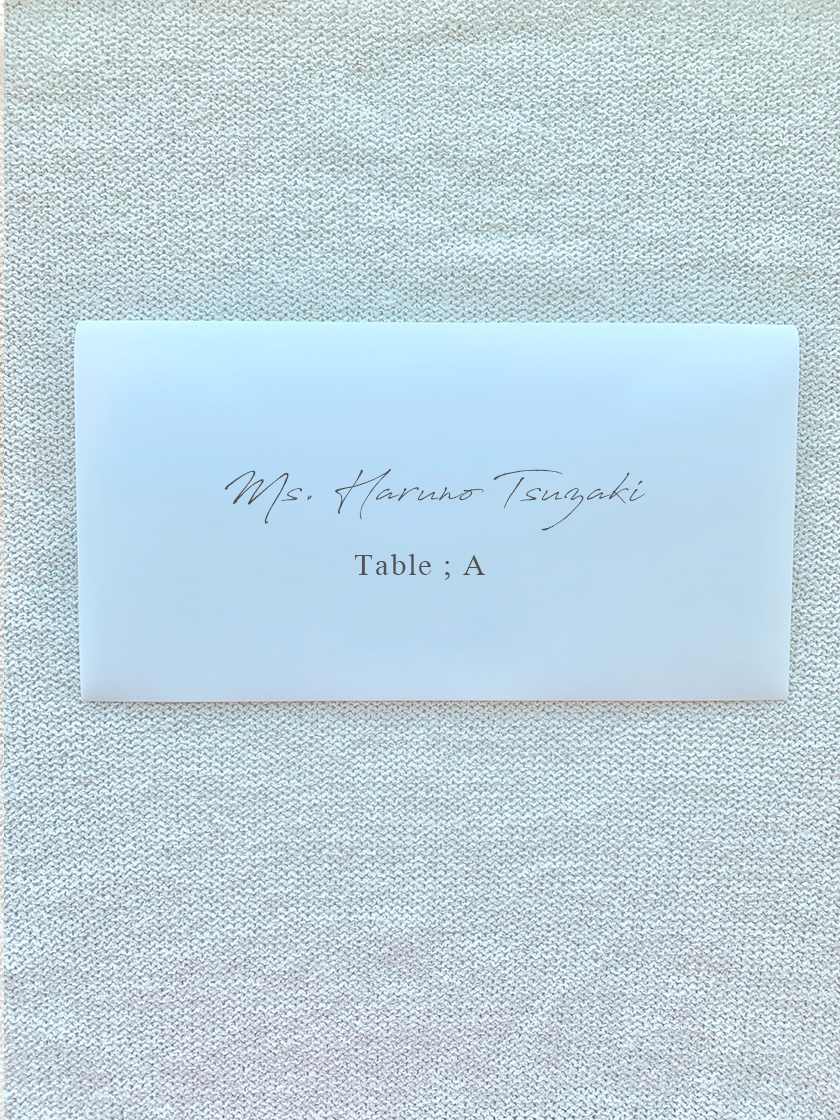
In this article, I will introduce how to create name labels.
It’s explained in great detail so that even beginners can easily understand, so please make use of it♡
◆ How to Insert Name Labels for Mask Cases ◆
<①> Purchase the sheet
First, purchase sticker sheets for names (label stickers).
It seems good to use A-one’s transparent label stickers [Product Number: 28973], so I will introduce how to create labels using this sticker in this article.
(It is for inkjet printers)
➡ Here are the transparent label stickers*
The label sheets are A4 size, with 30 labels per sheet and 10 sheets (for 300 people!) for 1,881 yen.
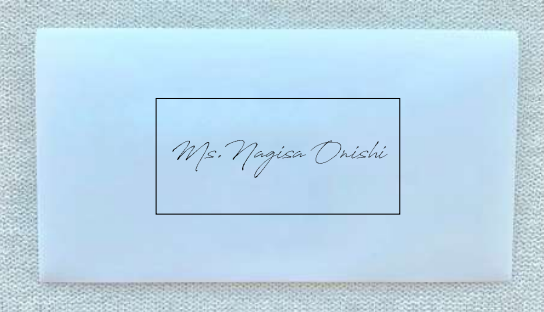
The size of one label is 53.3mm x 25.4mm.
Here’s how it looks when applied!
<②> Create the label stickers
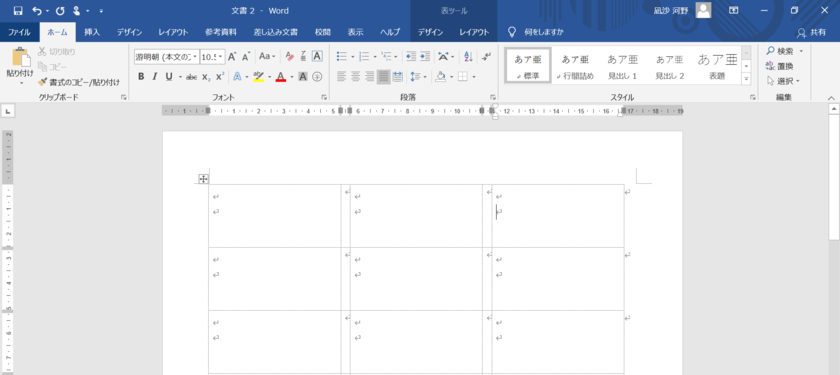
Next, let's create the label sticker frames.
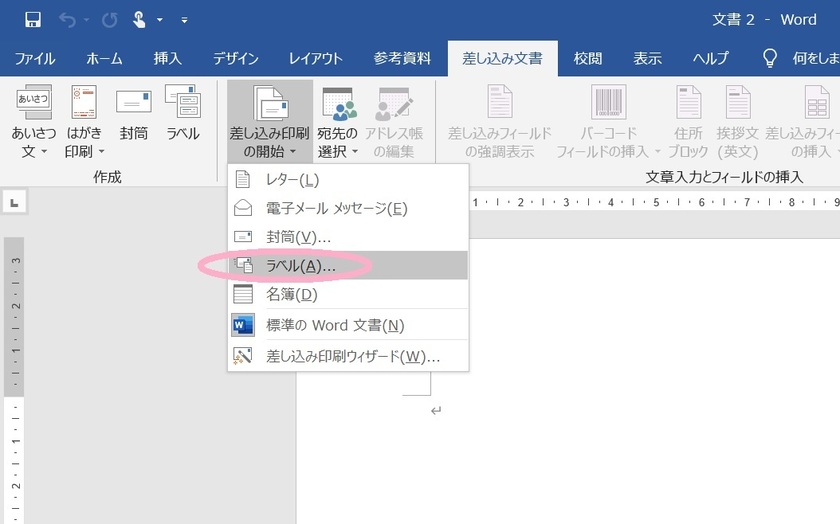
Open Word, go to the “Mailings” tab, and start the mail merge > click on Labels.
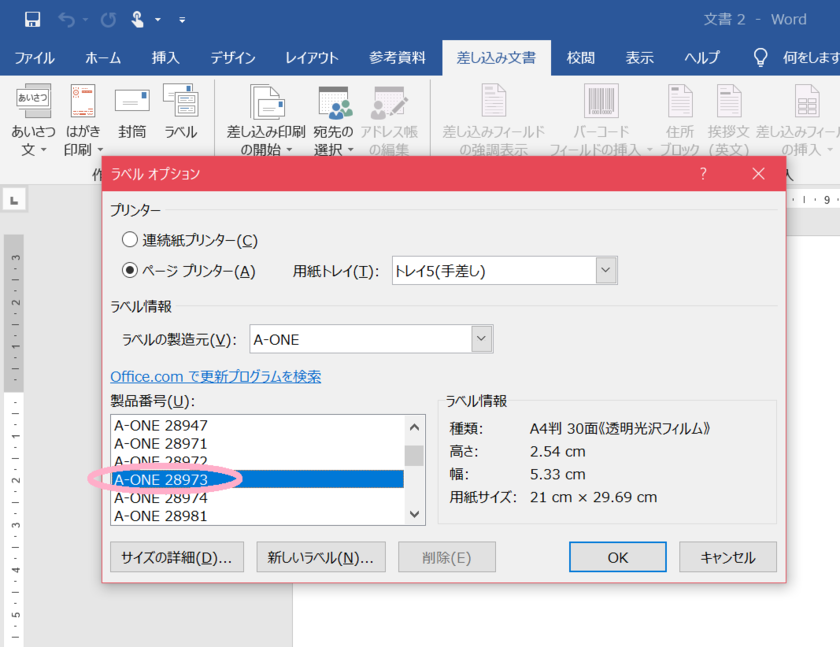
When the label options appear, set the label manufacturer to “A-ONE” and the product number to “A-ONE 28973.”
(If you are using other paper, please specify the model number of that paper.)
The template is now created!
<③> Enter the guests' names
Next, enter the guests' names into the label stickers.
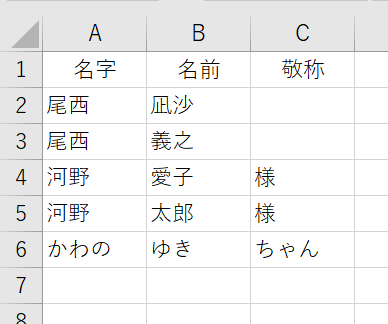
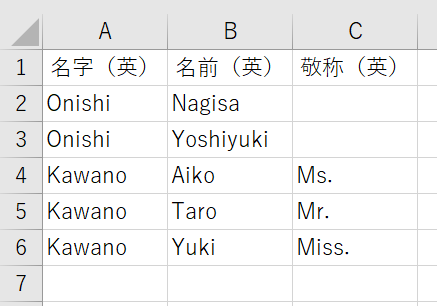
It’s convenient to keep a list of the guests' names in Excel instead of typing them directly into Word.
◆ For Japanese
◆ For English
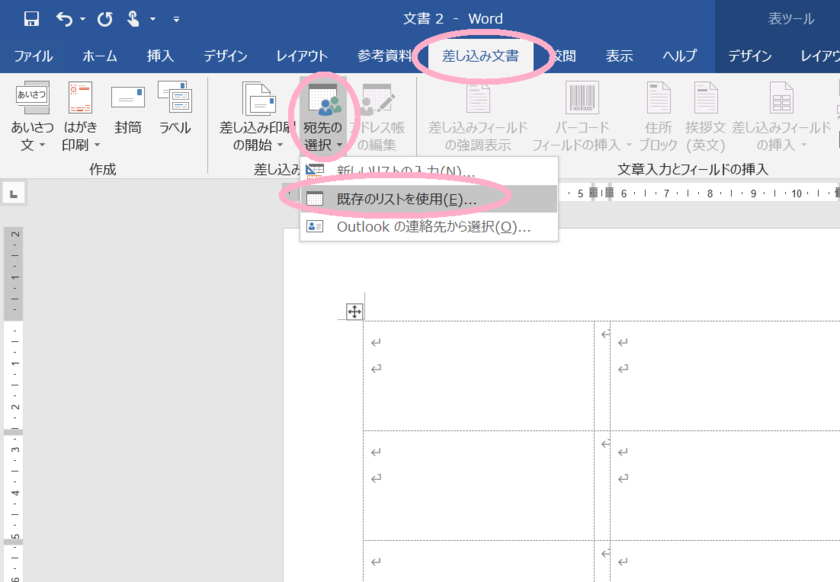
Once your Excel file is ready, go to the “Mailings” tab and select Recipients > Use an Existing List.
Choose the saved Excel file*
From the “Mailings” tab, insert the merge fields in the order of “Last Name,” “First Name,” and “Title.”
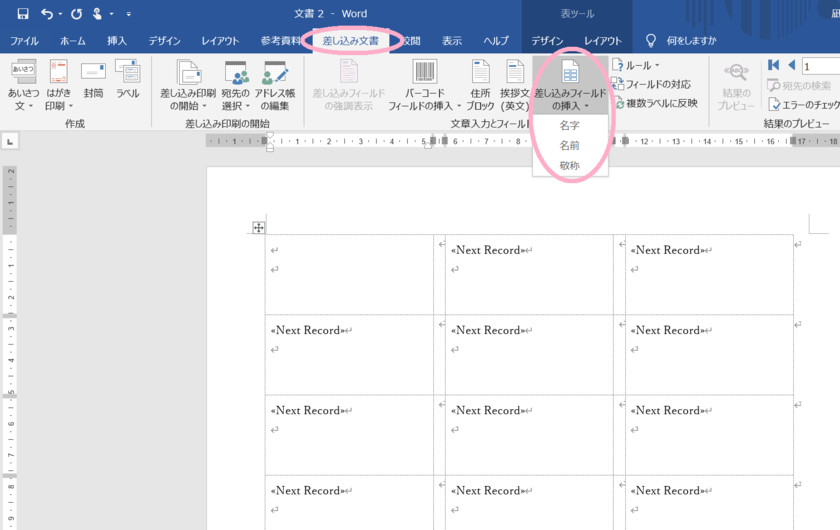
In the upper left label, input ≪Last Name≫≪First Name≫≪Title≫, leaving a half-width space between the last name and first name and aligning it to the center.

From the “Mailings” tab, click on Update Labels > Preview Results, and the names will be reflected on the first page.

Click Finish & Merge > Edit Individual Documents,
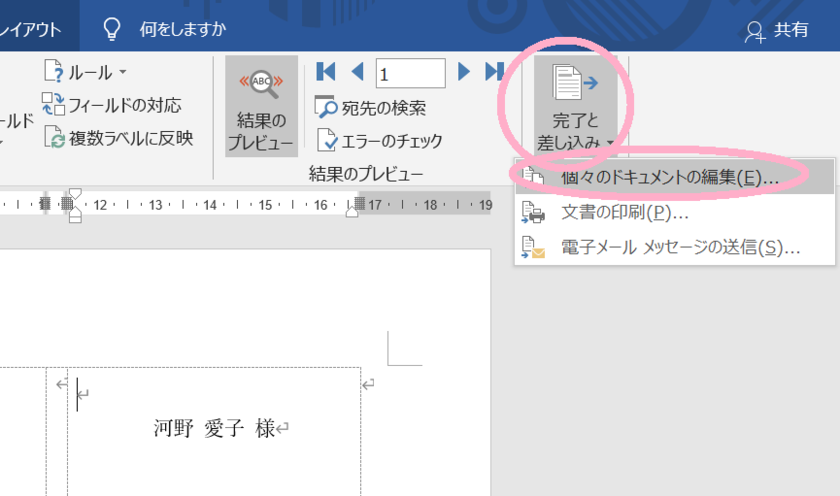
and set the merge records to “All” and press OK, all the names will be reflected.
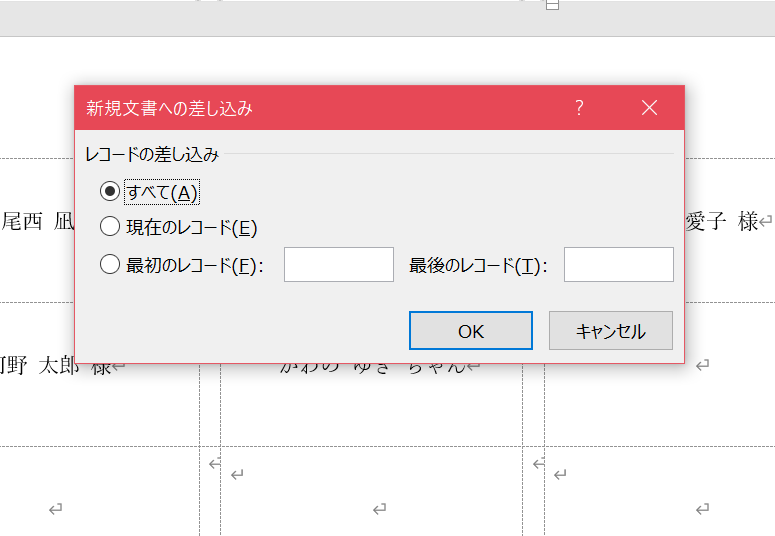
Adjust the font size and boldness to make it easy to read. I think the size at the edge of the frame is easy to read*
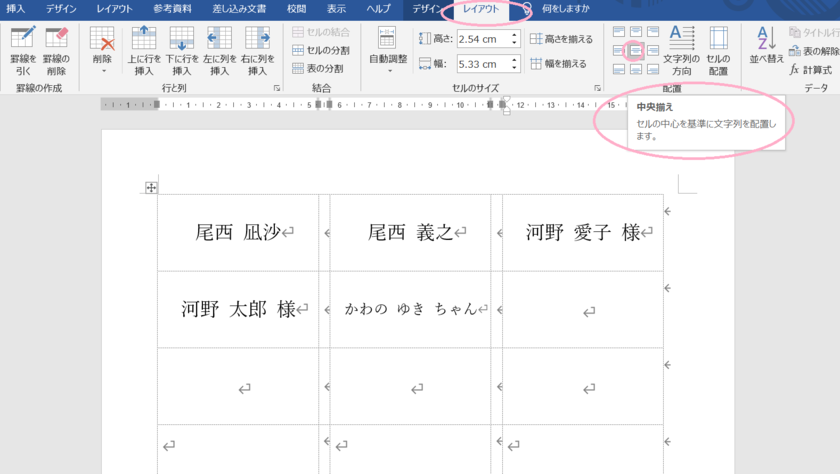
After selecting all the text (you can select all text by pressing ctrl+A), click Layout > Center to align it perfectly in the middle*
Double-check for any typos and print it on the label, and you have completed your name stickers!♡
◆ For English…
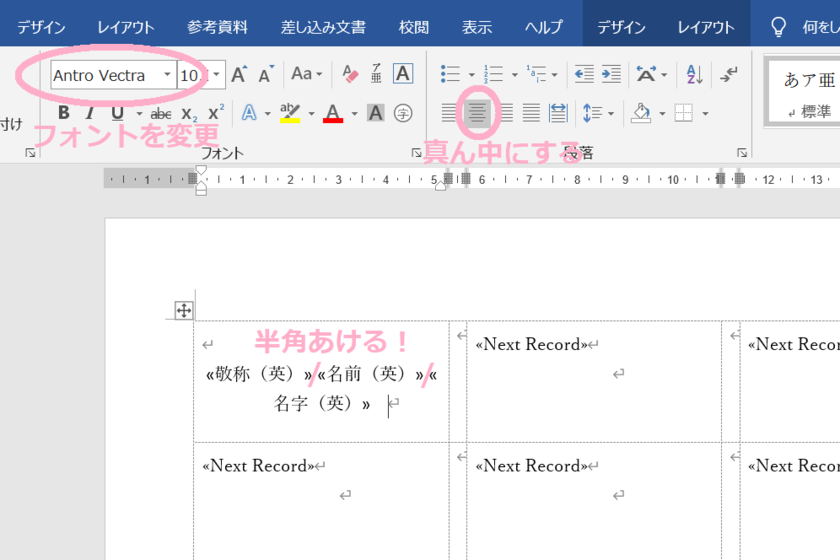
For English, insert the merge fields in the order of “Title,” “First Name,” and “Last Name.”
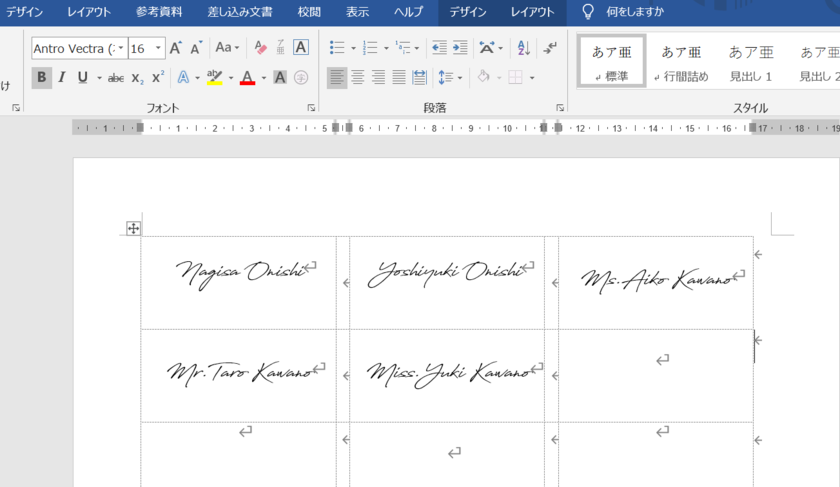
Set the font to “Antro Vectra” and center the text, and it will reflect like this♡
After performing the mail merge, adjust the font size.
The font is thin, so using bold may be easier to read. Choose your preferred one*
![marry[マリー]](https://imgs.marry-xoxo.com/assets/marry_logo-e3a503203d635925f956631f4df079fe97f587ed360274455ead4fe26052b631.png)
 結婚式DIY
 ペーパーアイテム
 通販
通販
 ウェディングアイテム
 コラム
コラム
 ウェディングケーキ
 お金・節約
お金・節約
 髪型・メイク
 ドレス
ドレス
 和装
和装
 前撮り・ウェディングフォト
 靴・アクセサリー
 ブーケ
ブーケ
 挙式
挙式
 披露宴
披露宴
 ウェルカムスペース・装花
 引き出物・ギフト
 BGM・ムービー
 二次会
二次会
 ラブラブ結婚生活
 プロポーズ
プロポーズ
 顔合わせ・結納
 入籍
入籍
 式場探し
式場探し
 ハネムーン
ハネムーン
 ネイルアート
 指輪
指輪
 美容
美容
 新郎
新郎
 両家家族(親族)
 ゲスト
ゲスト
 韓国風
韓国風


