Essential Items for Weddings: How to Make Wedding Rosettes (Advanced Guide) ♡
2017.01.12 published
Rosettes that make you happy whether you give or receive them...♡
Rosettes, which are not only popular for the bride and groom but also play an important role as guest table cards and escort items, have become a must-have item for weddings ♩
By putting effort into the ribbons, embellishing with pearls, and doing DIY, you can bring out your originality, which is one of the great things about handmade rosettes.
By the way ♡ Do you have a rosette supporter?
In this article I wrote last time:
➡ Easy DIY Wedding Rosettes with 100 Yen Shop Items♡
Here, I introduced the method of making rosettes using a rosette supporter. Thank you for the positive feedback on Instagram and other platforms♡
A rosette supporter is an item that you can create using partition boards sold at 100 yen shops, allowing you to make the pleats of the rosette ribbons more easily with masking tape or similar materials.*
This time, I will introduce an advanced method for making such rosettes. However, it’s just a little extra step that can significantly change the atmosphere. I hope you'll find it useful ◎
Start by removing the ribbon from the rosette supporter and sewing the ends together!!!
This time, I prepared ribbons of this width.
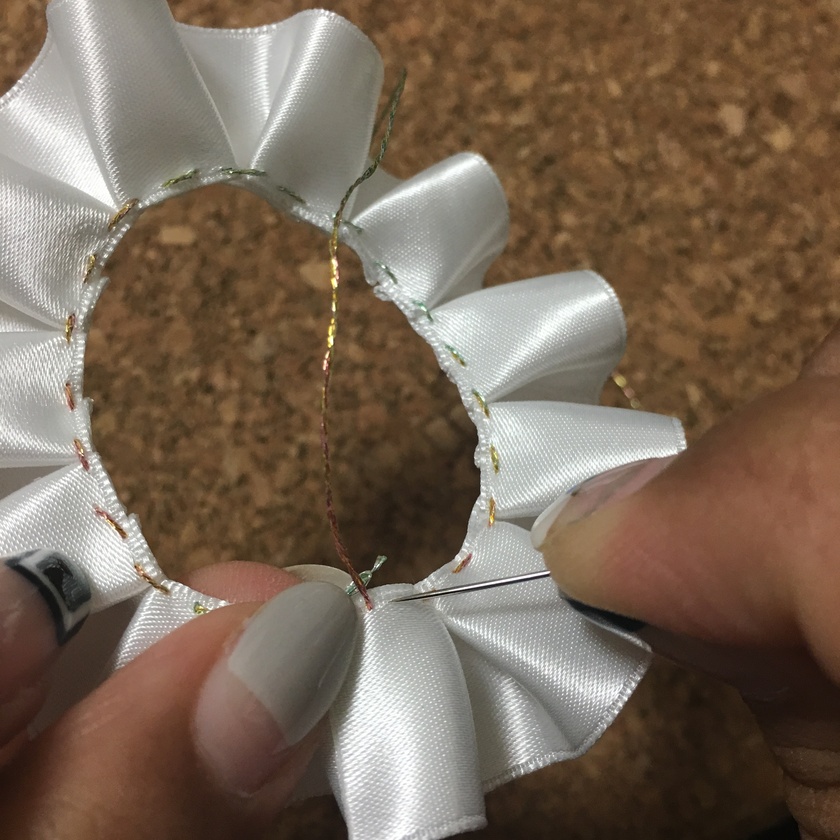
Last time, I started the finishing process from here, but this time we're going to add an extra step. Without cutting the thread, flip it over and sew one more round✳︎
*For the steps up to this point, please refer to the article below♡
➡ Easy DIY Wedding Rosettes with 100 Yen Shop Items♡
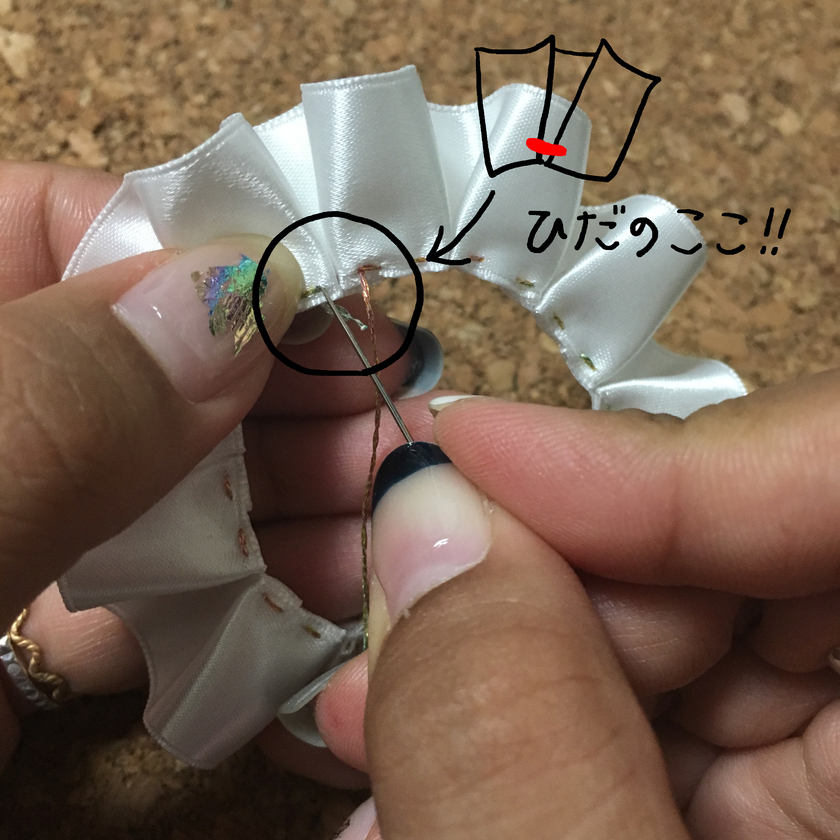
The key is to sew the parts of the pleats that don't have threads going through them.
When assembled with this part, just this extra step will result in a beautifully packed finish☆ Using 18mm for the outer layer, 15mm for the inner layer, and 24mm for the tail part of the ribbons.
Wait a minute! The covered buttons are out of stock…
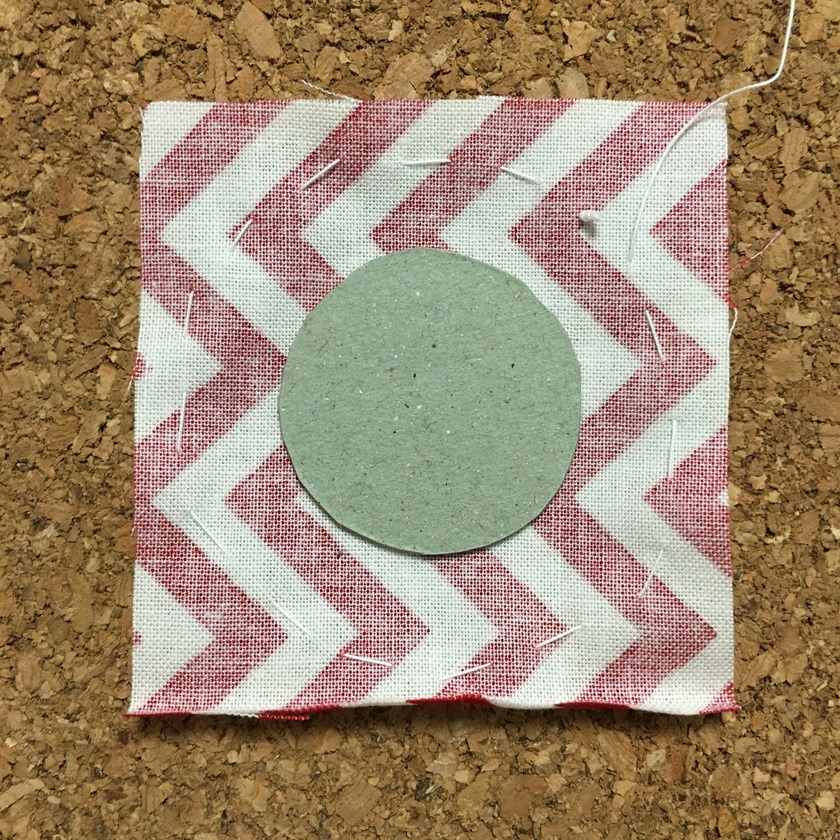
Covered button kits, which allow you to easily make covered buttons with your favorite fabric, have become very popular. But no worries, you can substitute with thick paper!!!
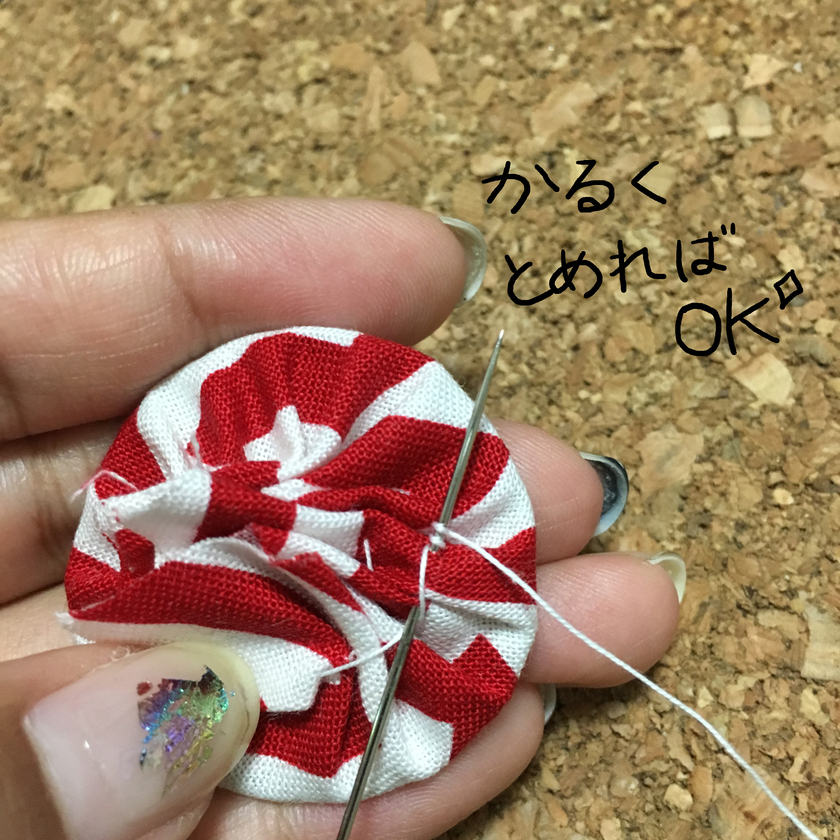
Prepare thick paper cut into a circle and fabric cut larger than that. Sew around it in a rounded "running stitch".
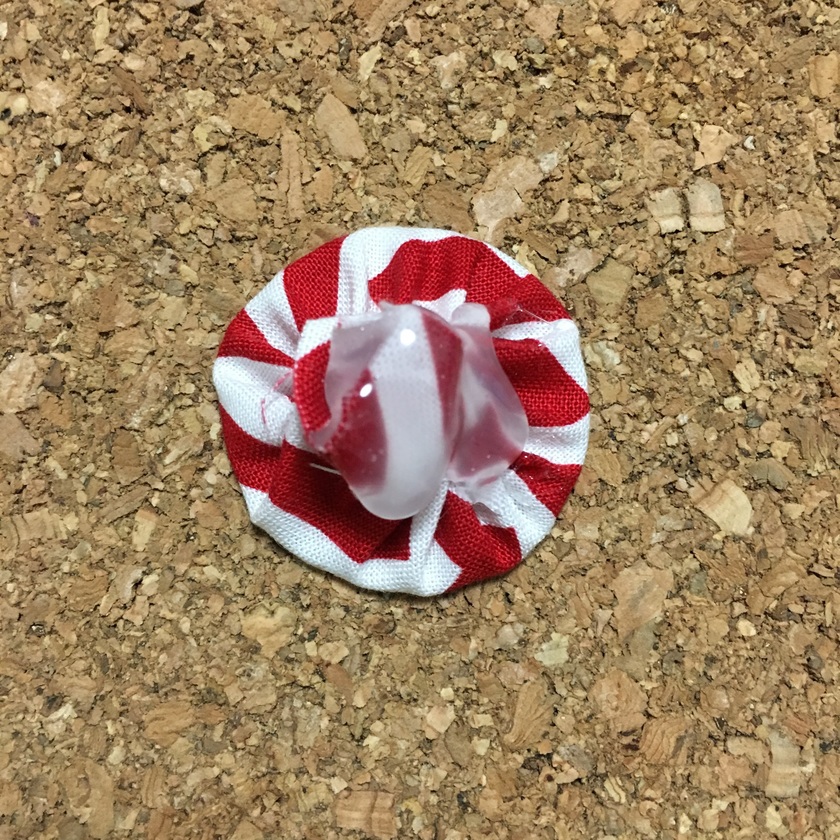
Tighten the thread to shape it. Just secure it simply, cut the thread, and you're done◎ See? Easy, right?
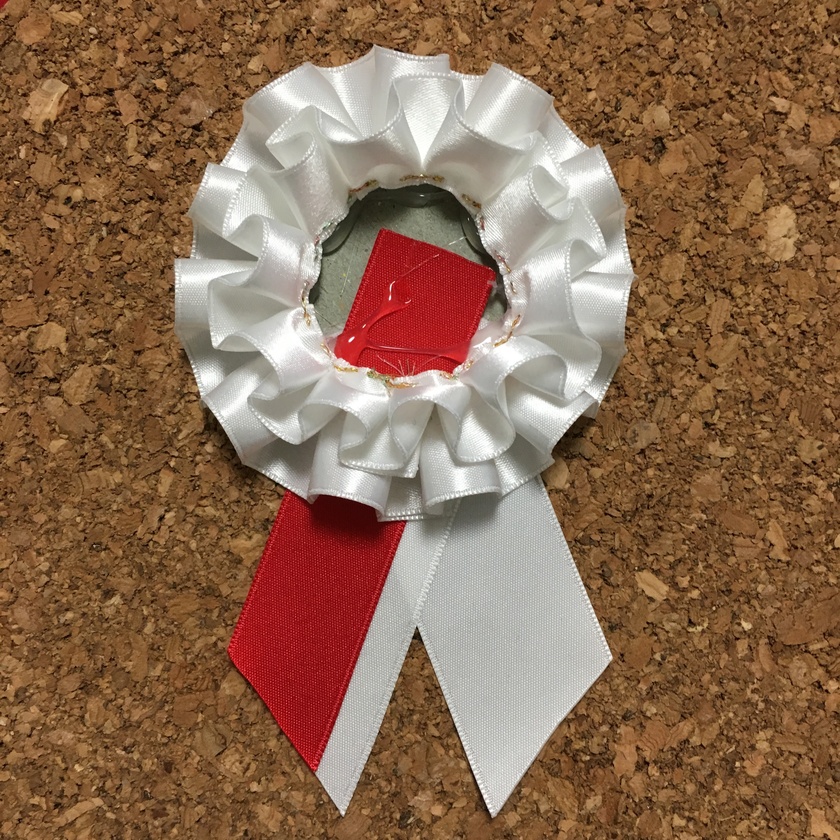
Finally, it's assembly time*
To prevent the thread from unraveling, make sure to apply plenty of glue where you secured it.
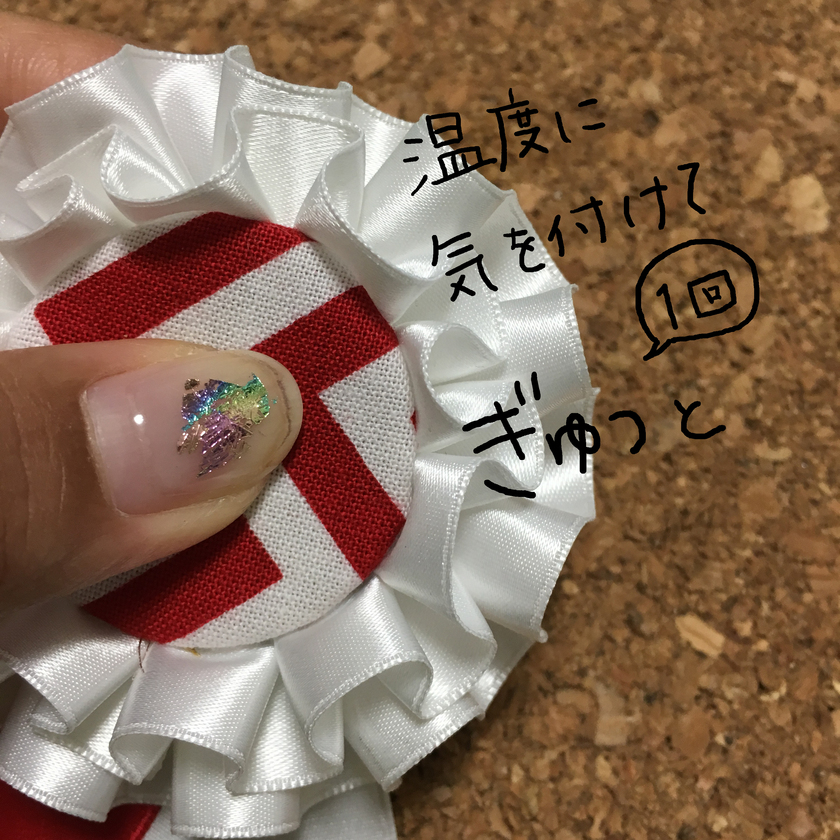
Be careful with the heat… and press firmly.
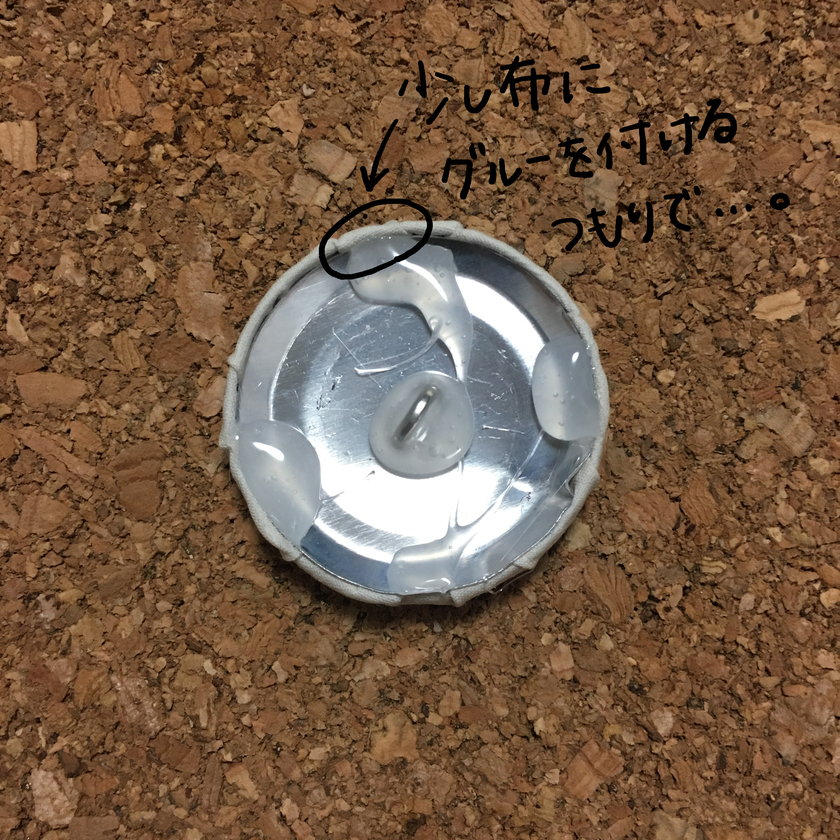
If you're using a covered button, even though it won't be visible from the front, applying a bit of glue to the fabric will enhance its strength!
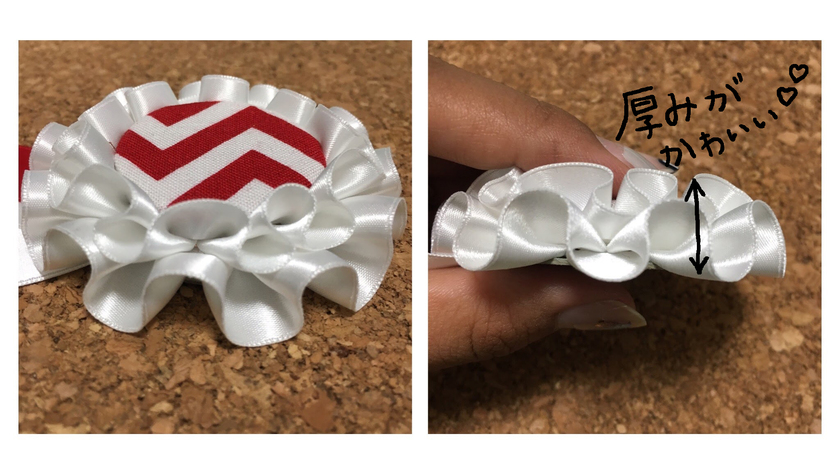
Adding a bit of thickness will give it an even cuter finish♡
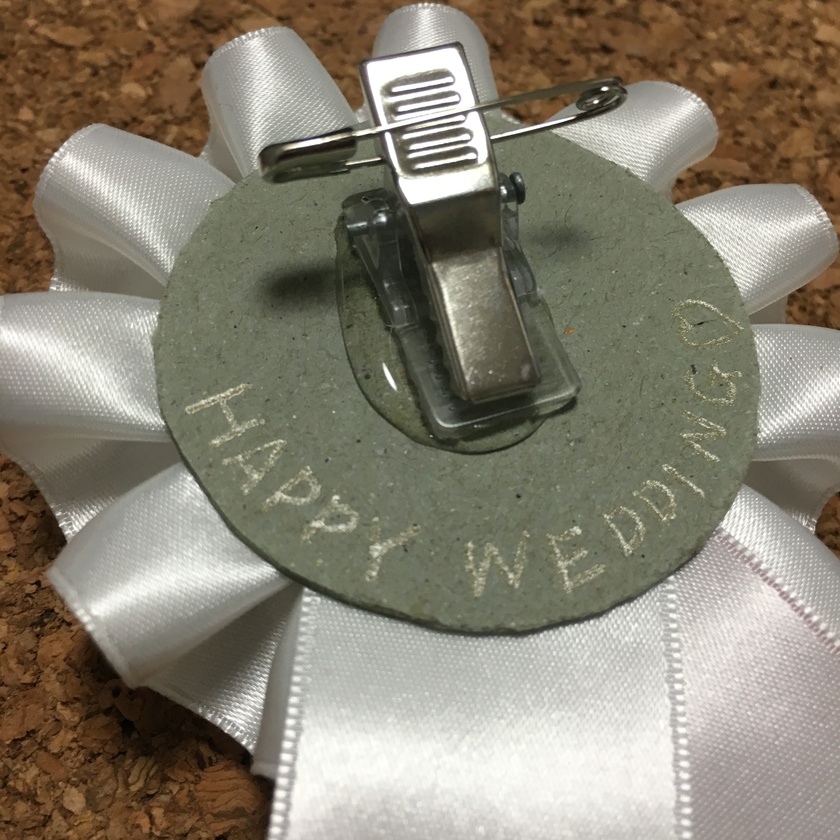
Attach a brooch back to the back. Writing a message on the base thick paper with gold or silver pens is also stylish◎
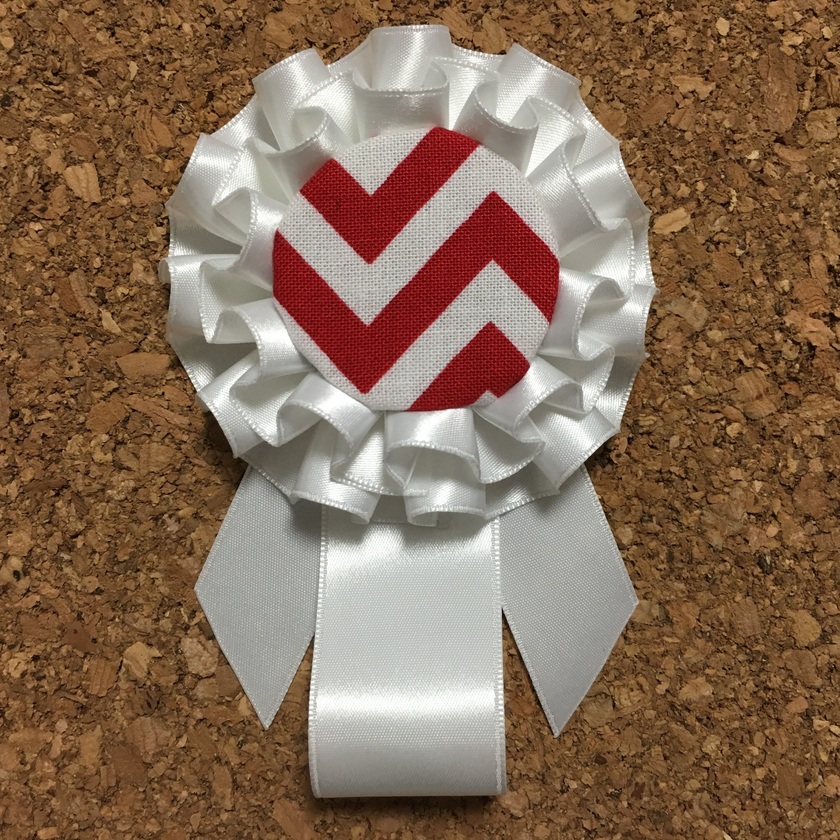
It’s completed! The tail part can also be rounded, and three-dimensional to look adorable. Let your personality shine☆
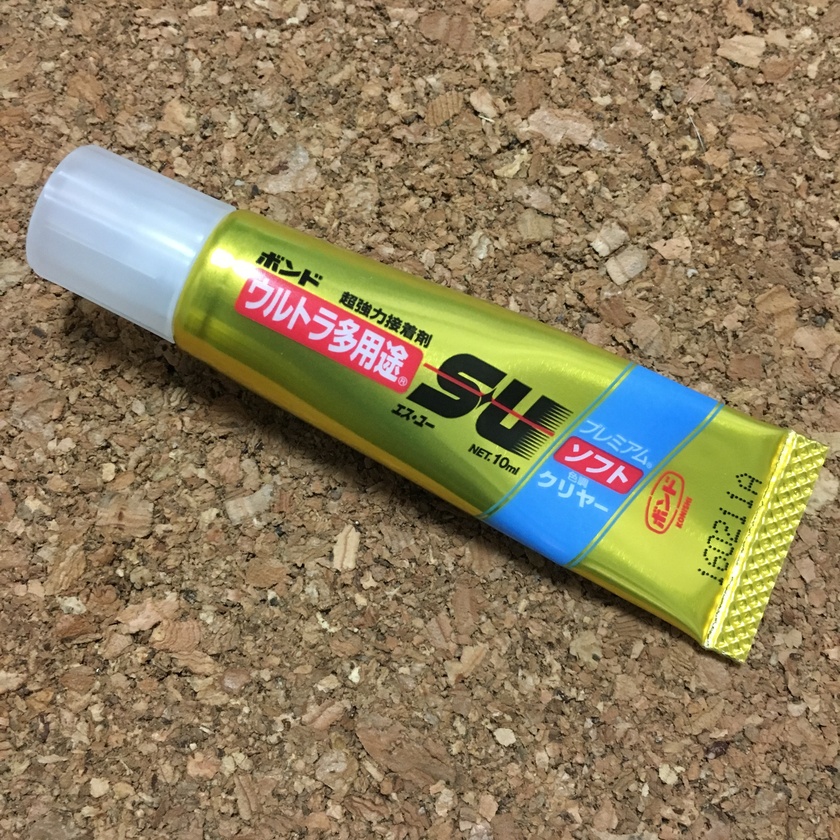
Be very careful as the glue gun is very hot! If you choose not to use a glue gun, I recommend using a slightly flexible adhesive that hardens in this way. (I also used it when attaching the brooch back)
For yourself, or as a gift…♡
How was it? I introduced how to make rosettes, which are indispensable for wedding coordination items and table cards* Please try using an original rosette to add some color to your wedding memories ♩
For the center of the rosette, using "布プリ" allows you to print on fabric at home with your printer, which is convenient.
Using a template with guide lines, you can freely enter text or photos and print them out♡
➡ You can find the rosette template here** (it costs 1122 yen)

![marry[マリー]](https://imgs.marry-xoxo.com/assets/marry_logo-e3a503203d635925f956631f4df079fe97f587ed360274455ead4fe26052b631.png)
 結婚式DIY
 ペーパーアイテム
 通販
通販
 ウェディングアイテム
 コラム
コラム
 ウェディングケーキ
 お金・節約
お金・節約
 髪型・メイク
 ドレス
ドレス
 和装
和装
 前撮り・ウェディングフォト
 靴・アクセサリー
 ブーケ
ブーケ
 挙式
挙式
 披露宴
披露宴
 ウェルカムスペース・装花
 引き出物・ギフト
 BGM・ムービー
 二次会
二次会
 ラブラブ結婚生活
 プロポーズ
プロポーズ
 顔合わせ・結納
 入籍
入籍
 式場探し
式場探し
 ハネムーン
ハネムーン
 ネイルアート
 指輪
指輪
 美容
美容
 新郎
新郎
 両家家族(親族)
 ゲスト
ゲスト
 韓国風
韓国風


